How to Make Nutella Slime
A fun twist on classic slime—Nutella slime uses chocolate-hazelnut spread, white school glue, and liquid starch for a wonderfully unique slime that kids will love. About 15 minutes, enough for 2 kids.
Cooking Info
- Time:About 15 minutes
- Difficulty:★★★
- Servings:Enough for 2 kids
- Cost:About $10
- Recommended for:Ages 5+
Recipe highlights
Plastic mixing spoon or spatula

Use a plastic spoon or spatula to stir the Nutella and glue until smooth.
See ProductMeasuring cup

Ensures that we use the correct amounts of each ingredient to create the perfect slime consistency.
See ProductAirtight storage container
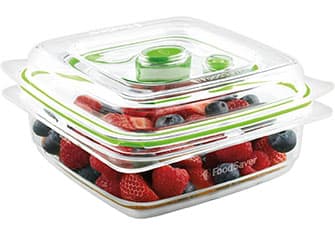
Ideal for storing the finished slime, helping maintain its texture and prolong its lifespan.
See ProductMaterials
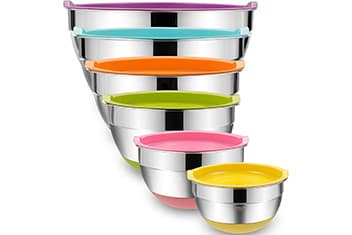
- Large mixing bowl
- Plastic mixing spoon or spatula
- Measuring cup
- Airtight storage container
Ingredients
- Nutella (chocolate-hazelnut spread—the base of the slime, giving it its unique color and scent)
- White school glue (binder that provides the necessary stickiness)
- Liquid starch (slime activator; reacts with the glue to form the stretchy, gooey consistency)
- Water (thins the mixture and helps achieve the ideal slime consistency)
Directions
- Clear and clean your workspace. Find a spacious table or countertop and clear it of any unnecessary items. Ensure the area is clean to avoid any unwanted particles in your slime.
- Gather all your ingredients and tools. Have your Nutella, white school glue, liquid starch, water, mixing bowl, mixing spoon, measuring cup, and airtight container at the ready.
- Set up an area for slime play and drying. Designate a large tray, silicone mat, or clean table covered with craft paper. Set aside a flat, non-stick surface for the slime to dry after playtime.
- Mix the Nutella and glue. In your mixing bowl, combine equal parts Nutella and white school glue (about ½ cup of each for a small batch). Stir with your mixing spoon until you get a smooth, evenly mixed paste.
- Add the water. Gradually add water to the mixture—start with ¼ cup and stir well. Add more a little at a time until it reaches a pudding-like consistency.
- Add the liquid starch. Slowly pour in the same amount of liquid starch as you used for the Nutella and glue. As you stir, the mixture will start to form into a blob—that’s the slime forming.
- Knead the slime. Once the slime has formed, knead it for about 5 minutes until it’s nice and stretchy. If it’s too sticky, add a little more liquid starch and knead it in.
Making slime at home with kids is a joy-filled and engaging activity that combines fun, creativity, and a bit of science. One of the remarkable things about making slime is that you can often use common household items, transforming them into something wholly different right before your eyes.
Nutella slime is an unconventional but delightful twist on the classic recipe. Our favorite chocolaty spread isn’t just for breakfast anymore—with a few simple ingredients and steps, you can turn Nutella into a wonderfully unique slime that kids will absolutely love.
Note: This slime is not edible. It contains glue and liquid starch. Supervise kids during play and store in an airtight container when not in use.